An animation of the word POLYFORMS written in multiple fonts.

How To Sell Your First NFT on teia

** This post contains affiliate links.

how to sell your first nft on teia

In this post, you’ll learn how to mint your first NFT on teia, an NFT marketplace on the Tezos blockchain.

You’ll need no prior experience with NFTs or cryptocurrency; I’ll walk you through each step, from setting up a cryptocurrency wallet and getting some crypto (for free) to creating a profile on teia and minting your piece.

I’ll wrap up with some tips on how to go about sharing your piece with the community and finding a buyer.

For this guide, I’ll assume you’re on a desktop computer and that you also have a creation ready to mint.

teia works with the following file types: gif, jpeg, png, svg, mp4, webm, glb, mp3, wav, flac, pdf, html (zip archive) and md.

Get your work ready in one of those formats before getting started.

UPDATE, 04.02.2022: Since writing this piece teia (formerly known as hic et nunc) has gone through a number of changes as a platform. Some of what you see in this post might now be a little different. The overall process is still mostly the same.

Once you’ve followed along below and got the basics down, you might want to also explore other NFT platforms on Tezos like OBJKT.com or Versum which work in similar ways.

Why teia?

At the time of writing, teia (formerly known as hic et nunc) is one of the most popular NFT marketplaces. It has a large and welcoming community, so it’s a great place to start if you’re new to NFTs.

teia also runs on the Tezos blockchain, which is a Proof-of-Stake blockchain (compared to Ethereum’s Proof-of-Work blockchain) and uses a very low amount of energy.

If you have any hesitations about NFTs because of environmental concerns, then teia is the place to be. You’ll even see people sharing hic et nunc pieces on Twitter with the hashtag #CleanNFT.

UPDATE, 15.09.2022: As of September 15, 2022 the Ethereum network no longer operates using Proof-of-Work. An event called The Merge transitioned Ethereum to Proof-of-Stake, which uses 99/9% less energy.

Many artists still choose to create on Tezos because of the strong community, but environmental concerns are no longer a factor.

Step 1: Create A Wallet

The first thing you’ll need to do is create a cryptocurrency wallet. For teia, you’ll need a Tezos wallet in particular.

There are a number of Tezos wallets available, but for this guide, I’ll use Temple because I find it to be the most approachable wallet for beginners.

Head to templewallet.com β†’

Follow the instructions to install Temple in your browser and you’ll end up on the screen below.

Click “Create a new Wallet” and set a strong password.

Your wallet is where you’ll store not only your cryptocurrency but also any NFTs you own, so you’ll really want to make sure you keep this secure.

I’d recommend using a password manager like 1Password to create and store a randomly generated password.

Backup Your Wallet's Seed Phrase

You’ll also be presented with a screen that asks you to “Backup new Seed Phrase”.

It’s also very important that you note this down and save it securely. Your seed phrase is what will allow you to restore your wallet if you ever lose your computer or need to set up your wallet on a new one.

Because your seed phrase gives complete access to your wallet, it’s important that you NEVER share this with anyone as they can use it to steal your funds.

Backup New Seed Phrase
Backup your seed phrase and keep it secure. Never share it with anyone.

Get Your New Wallet Address

And that’s it – you now have a brand new Tezos wallet!

At the top of the window, you’ll see a string of letters and numbers.Β This is your public wallet address, the address to which you’ll receive Tezos. Click on it to copy and save it somewhere.

Wallet Address
Your wallet address is like your bank account number. Use it to receive funds.

It’s perfectly safe to share this with others – in fact, this is how people will send you cryptocurrency or how you’ll send yourself some crypto once you’ve got some in the next step.

Speaking of getting some crypto… the next step is getting some Tezos to pay the fees when minting your NFT.

Step 2: Getting Tezos (XTZ)

Before you can get to minting your NFT you’ll need to get some cryptocurrency.

When minting an NFT you need to pay a transaction fee to the blockchain to process the action. On teia, this requires a small amount of a cryptocurrency called Tezos (XTZ). Don’t worry, the fees on teia/Tezos are very cheap (only a few cents).

There are many ways to get Tezos, but I’ll show you 2 options. The simplest is to buy some on MoonPay using your bank account or credit card, but you can also ‘earn’ cryptocurrency for free by taking short quizzes on Coinbase.

Skip ahead to the option you’d prefer, or skip to Step 3 if you already have some Tezos.

Option 1: Buy Tezos On MoonPay

Head to buy.moonpay.com, and select XTZ – Tezos from the list of currencies. The minimum amount of crypto you can buy on MoonPay is $30.

Enter your Tezos wallet address in the 2nd step, then follow the rest of the instructions to buy some Tezos and send it to your wallet.

It’s normal for it to take an hour or so for the funds to show up, so take a break and work on your piece!

If this is your first time using cryptocurrency it can be a little nerve-wracking wondering if everything will show up or if your money has disappeared 😱

I’d recommend starting with the minimum amount until you’re comfortable with the process.

Option 2: 'Earn' Tezos On Coinbase

If you’d rather not buy any cryptocurrency you can earn some for free.

Coinbase, a cryptocurrency exchange you might have heard of, has a program called Learn and Earn. You can earn small amounts of crypto simply by watching videos about cryptocurrency, then passing a simple test.

This isn’t a massive amount of money, only a few dollars, but it’s more than what we need to create an NFT.

Head to Coinbase and create an account β†’

Once you’ve followed the steps to create an account, head to the Learn and Earn tab down the left-hand side. Here you’ll find a number of opportunities to earn some crypto, so do a few of these.

Then, head to your Portfolio and click on one of the cryptocurrencies you’ve earned. On the cryptocurrency’s page, head to the Overview tab and click on Convert on the right-hand side.

Here you can convert the crypto you’ve earned to Tezos.

Head back to your Portfolio and find the new Tezos you’ve just converted.

In the Send box on the right, you’ll need to enter the address of the Temple wallet you set up in Step 1. Your wallet address is the long string of letters and numbers that should start with ‘tz’.

Enter this in the ‘To’ field, set the amount of Tezos you want to send, then hit ‘Continue’.

It can take a few minutes for the Tezos to appear in your wallet and it’s normal for this to take up to even an hour in periods of network congestion.

Reward yourself with a little break and move on to the next step once the funds have arrived in your wallet.

Step 3: Mint Your NFT

We’re almost there! Only a few more things to do until you have your first NFT.

Head to teia.art β†’

In the top right you’ll see a ‘sync’ button. Click this and select Temple from the list of wallets that shows up.

A popup should open asking you to Connect. Click this to link your wallet to teia.

You can access the Settings page from the hamburger menu at the top if you want to add a profile picture, description or link your Twitter profile.

For now, select OBJKT (mint) from the menu.

This takes you to the Mint page where you can fill in all the info about your piece and upload the file.

Title, description and tags are fairly self-explanatory.

Editions defines how many copies of your piece you want to create. This can be anywhere between 1 and 10000. It’s totally up to you how many editions you want to create, there are no rules here.

There are many things to think about regarding how to price your work and how many editions to create, but that’s a topic for another time!

Royalties defines the percentage of any resales that goes to the original artist. So, if someone buys your piece then resells it, you’ll get a percentage of that resale based on what you enter here. A good standard royalty is between 10% and 15%.

Upload your file and click Preview.

Note that some file types like .mp4s also require a cover image (in jpeg, png or gif format), so make sure you’ve got something prepared for this if you need it.

On the Preview page, make sure you’re happy with everything you’ve entered. Minting something on the blockchain is permanent, so you can’t edit any mistakes afterwards! It is possible to ‘burn’ your pieces and remint them, but you have to pay a fee every time you do this so rather make sure you get it right the first time.

When you’re happy, click Mint.

teia will prepare your OBJKT and a window should pop up asking you to confirm a transaction. This is the minting fee mentioned previously.

Anytime you need to interact with the blockchain, for example, to mint your piece, list it or buy someone else’s piece, you’ll be asked to confirm the transaction, so get used to this popup.

Click Confirm and wait for the transaction to be processed by the blockchain. This may take up to a few minutes, but after a few moments, your new NFT will be minted πŸ‘

Click the menu again and select Manage Assets to see your newly minted NFT.

Step 4: List Your NFT

There’s one final step. You’ve created your NFT, but now you need to list it on the marketplace. On teia this is called swapping.

Click on the NFT in your collection and at the bottom you’ll see tabs labelled; info, collectors, history, swap and burn.

Select swap.

Here you can decide how many editions of your NFT you want to list and at what price. You don’t have to list all of them now; you can list some now and others later. You can even list different editions at different prices.

Enter the amounts you want and click swap.

You’ll again be asked to confirm a transaction and pay the fee, so click Confirm.

There’s no visual confirmation once the OBJKT has been swapped, but you can always check the progress of the transaction by opening the Temple Browser Extension and looking at the activity tab.

The activity will say Pending while the transaction is still being processed and will change to Applied once it’s done.

Step 5: Find A Buyer, Make More Art!

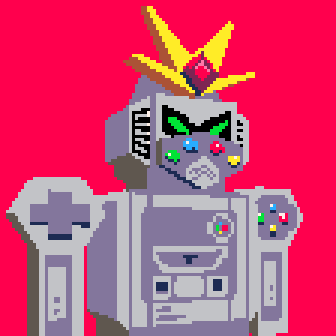
And that’s it! You’ve minted and listed your first NFT on teia πŸ₯³πŸ‘

It might seem like a lot of steps, but once you’ve got the hang of it, it shouldn’t take you more than a minute or two to mint something.

All that’s left is for you to promote your beautiful NFT and find someone who wants to collect it.

The teia and broader NFT community is very active on Twitter, so that’s a good place to start. Look for hashtags like #teia, #nft, #nftart, etc.

Be sure to not just “shill” your own art. Engage with other artists, comment on their work and maybe even buy some NFTs. The NFT community is really positive and fun and people are generally pretty willing to help out and show some love.

There is also lots of NFT activity on Discord, so hop into the teia Discord. It’s a great place to interact with the community, share your work and ask questions if you get stuck.

I hope this post was useful and you made it all the way to the end. If you have any questions, feel free to reach out on Twitter.

Good luck, and have fun!

Share

Read Next...

Join Me

Social media comes and goes but email is forever. Join the list to always hear about the latest Polyforms content πŸ’Œ

No spam. Emails only sometimes.